How to correctly select, operate, and maintain tools for efficient grinding
Industrial material removal applications are extremely challenging, so combining productivity with safety is paramount. To that end, fabricators should take steps to select the right grinding tool for the job and learn how to operate and maintain it correctly.
Material removal in metalworking can encompass grinding and cutting, deburring of casting parts, chamfering of frames and structures, surface preparation before welding, weld seam removal, and surface finishing and sanding.
Each has inherent risks, but these can be minimized by selecting the right grinding tools and learning how to operate and maintain them correctly.
Assess the Environment
Before selecting a grinding tool, assess the working environment. Material removal may take place in confined spaces, in controlled conditions within a factory or workshop, or even out at sea. Each presents certain risks that can affect safety and performance. If the workplace is enclosed, does it have suitable ventilation and dust extraction? Does it have an electrical supply that presents an electric shock risk? What other hazards, such as moisture, dust, or conductive metals, may be present?

Environmental factors influence product selection significantly. For example, electric grinders are not generally suitable in wet environments. The dust and abrasive particles created during grinding can also be detrimental to electric motors. And although composite casings reduce a grinder’s weight, they can be prone to damage when subjected to repeated impacts.
Pneumatic grinders present no risk of electrocution, their motors are not affected by particles or moisture, and their aluminum or steel casings reduce the likelihood of damage. An air motor is usually about one-sixth the size of its electric counterpart and about a quarter of its mass. This gives pneumatic grinders a high power-to-weight ratio and good maneuverability.
Power Considerations
As a key efficiency factor, the material removal rate affects the tool’s ability to run the abrasive, be it a grinding wheel, sanding pad, or a flap disc. Abrasives are designed to run at certain speeds. To that end, most pneumatic grinders have an air governor, which increases airflow as the operator increases the load, maintaining the rotation rate and speed for best abrasive performance.
Note that a power value for an air tool has a different meaning than a power value for an electric tool. For electric tools, the value given in horsepower (HP) or watts (W) indicates the power consumption of the electric motor, not the useful power where the abrasive contacts the workpiece.
The ratio between the power at the abrasive and the power consumption varies from tool to tool, but the average is between 0.5 and 0.6. So an electric tool with a power consumption of 1,000 W will likely deliver the equivalent of about 600 W of power at the abrasive. The power value of pneumatic tools refers to a value measured at the spindle. A pneumatic grinder with a stated power of 1,000 W is delivering that same value at the abrasive.
Safe Operation
When you take delivery of a new tool, check the documentation and keep it for future reference. Also, make sure that the grinder is fully assembled before connecting it to the power for the first time. And be sure to isolate the tool from the power supply when changing out any parts. All this sounds obvious enough, but many still skip these basic steps.
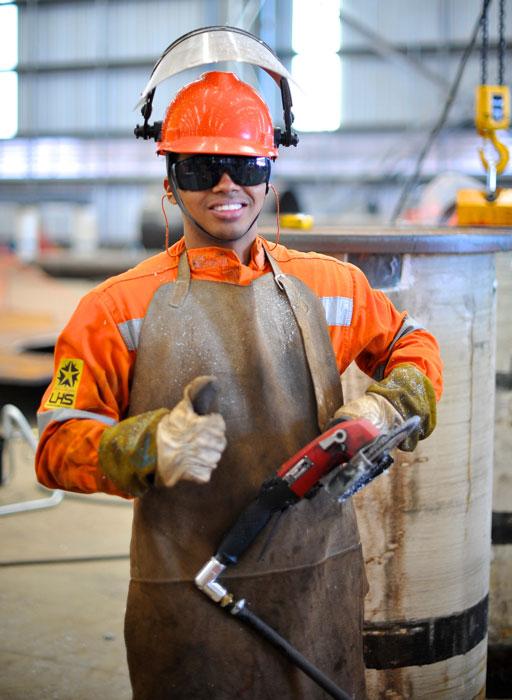
Figure 1
It’s critical to wear the right personal protective equipment when operating any power tool.
Before each use of the tool, ensure essential components like wheel guards, grinding wheels, and triggers are sound and working properly. Adjust the guard so it provides optimum protection. Always use the safety screw and original spanner provided, and don’t overtighten the flange or safety screw as this may lead to premature wear. Whether you are using it for the first time or adjusting tool components after months of use, test the tool before you begin grinding.
Wear the right personal protective equipment (PPE) when operating any power tool (see Figure 1). Essential PPE includes goggles or a visor, ear protectors and gloves, steel toe-capped boots, and protective clothing like a leather apron. In heavier applications, a safety helmet may also be necessary. Secure any loose clothing and hair, and remove any jewelry.
Many operators attempt to stall their grinding tool during the first minutes of work. While this is understandable—the operator wants to challenge the tool’s limits and stall torque to ascertain whether it is up to the job—it is bad practice. Stalling a grinder does not increase the rate of material removal and can be counterproductive. Excessive load is inefficient and can excessively fatigue and stress both the tool and operator. It also can lead to abrasive failure and possible injury.
To maximize productivity, find the pneumatic grinder’s sweet spot—the optimal force for achieving the best material removal rate. Even if you have used similar tools previously, get to know your grinder’s capabilities and limitations, as well as the operating and safety instructions from the manufacturer.
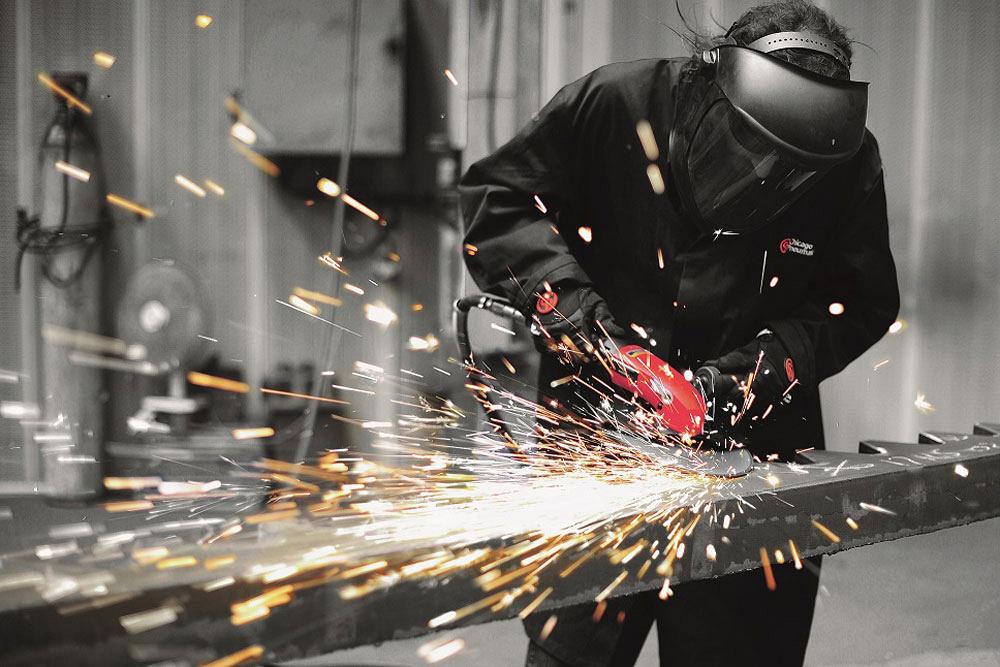
Rather than starting with maximum force and gradually backing off, start with gentle pressure and build up gradually. To check that you are operating the tool correctly without applying undue force, watch the spark stream created by the abrasive. When it is as bright as possible, you are applying the correct force (see Figure 2). For best abrasive use, try to maintain an angle of 30 degrees between the grinder and the workpiece surface.
Once you finish a job, make sure the machine is switched off and has come to a complete stop before setting it down. Never drop or throw the tool aside. Put the grinder down carefully only after you are sure there is no risk of it starting up again.
Maintenance Matters
As with any shop investment, consider the total lifetime cost—including service factors, ease of maintenance, and spare parts availability—rather than just the tool’s initial price. This will help ensure your grinding tool of choice delivers maximum productivity, safely and with minimal downtime.
Pneumatic grinders from reputable manufacturers will perform reliably over long periods, if you take care of them. A bit of TLC can go a long way. Like most high-precision machines, air tools need lubrication to deliver best performance. With pneumatic grinders, using a filter regulator lubricator (FRL) set at two drops per minute will keep the air clean and lubricated.
If you hear any abnormally loud noises or feel excessive vibration, stop using the grinder immediately. Isolate the tool from the power supply and seek help from someone qualified to investigate. Never be tempted to modify the tool yourself or dismantle safety-related parts such as the speed governor or overspeed shutoff. If these are damaged, you need to replace them.
Paper Versus Reality
Before investing in a new tool, take the time to assess how working conditions could affect tool performance. Ensure that operators know how to use their pneumatic grinders correctly and are following simple safety rules as part of their daily routine.

Figure 2
When the spark stream created by the abrasive is as bright as possible, you are applying the correct force.
Perusing product catalogs and choosing the most powerful and price-competitive tool on paper will not necessarily deliver the best value and performance. In the end, environmental considerations, correct operation, and proper maintenance have far more influence over workplace safety and productivity.
This article is based on “5 Benefits of Pneumatic Grinders” in an Expert Corner Technical Guide, one in a series published by Chicago Pneumatic Tool Co.
Photos provided by Chicago Pneumatic Tool Co.
Top 10 tips for pneumatic grinders
1. Assess the environment where the tool will be used. Hazards like moisture, dust, and conductive metals will affect product selection.
2. Select tools that are durable, lightweight, comfortable to handle, and offer a good power-to-weight ratio.
3. Ensure spare parts and after-sales support are available.
4. Always wear the right personal protective equipment, including eye, ear, and hand protection.
5. Do not apply undue force when using an angle grinder. Excessive force is inefficient and can fatigue and stress both the tool and the operator.
6. Use a filter regulator lubricator set at two drops per minute to keep the air clean and lubricated.
7. Before each use, ensure wheel guards, grinding wheels, and triggers are sound and working properly.
8. Stop using your grinder immediately if abnormal noise or vibrations occur.
9. Follow service instructions and the recommended maintenance regime.
10. Never attempt to dismantle or modify the tool yourself.
Comments